rwxr--r--
/dev/blog

Bez Hermoso, Software Engineer @ Square

  • Jump back up to your Git repo's root directory

    You want to jump back up to your project’s root directory from who knows many levels down. What would you do? Figure out the right amount of levels to cd ../../.. up? Run cd .. repeatedly until you get there? or run cd to an absolute path directly?

    If your project is managed with Git, here is a smarter way:

     
    $ cd $(git rev-parse --show-toplevel)

    The command git rev-parse --show-toplevel is a Git plumbing command that outputs the absolute path of the Git repository root of the project you are in. Therefore the most straight-forward form is to use its result as the argument for cd. No more repeating commands, figuring out exactly how far up the root is, or having to type out paths!

    The next obvious step is to make an alias of that command in your .bashrc or equivalent file:

     
    # Mnemonic: `gr` == `git root`
    # Also note the single-quotes; you don't want the sub-command to run on alias definition!
    alias gr='cd $(git rev-parse --show-toplevel)'

    From here on out, just run gr anytime you need to jump all the way up to your project root.

    We can take it a little further…


    What used to be this gr alias on my rc file evolved into a full-on shell function that handles some edge-cases:

    • Do nothing when I’m not in the project root instead of spitting an error and jumping to /
    • Be smart with Git submodules: if already in a repo’s root, jump up to the nearest parent repo in the tree, if any.

    Here it is in it’s current form in my rc file (I hosted this on Github if you’d like to clone it instead):

     
    function jump-to-git-root {
      local _root_dir="$(git rev-parse --show-toplevel 2>/dev/null)"
      if [[ $? -gt 0 ]]; then
        >&2 echo 'Not a Git repo!'
        exit 1
      fi
      local _pwd=$(pwd)
      if [[ $_pwd = $_root_dir ]]; then
        # Handle submodules:
        # If parent dir is also managed under Git then we are in a submodule.
        # If so, cd to nearest Git parent project.
        _root_dir="$(git -C $(dirname $_pwd) rev-parse --show-toplevel 2>/dev/null)"
        if [[ $? -gt 0 ]]; then
          echo "Already at Git repo root."
          return 0
        fi
      fi
      # Make `cd -` work.
      OLDPWD=$_pwd
      echo "Git repo root: $_root_dir"
      cd $_root_dir
    }
    
    # Make short alias
    alias gr=jump-to-git-root
  • Improved tmux experience

    If there is one tool I use the most, it has to be tmux. I do almost everything in it.

    However, as useful as it is, I feel like its not very user-friendly out-of-the-box. This post is a collection of things in my ~/.tmux.conf that makes tmux easier to use and to bring its more powerful capabilities within closer reach.


    A better prefix

     
    set -g prefix C-s

    C-s requires far less finger-flinging than the default C-b – the keys are close enough together, and it doesn’t conflict with any key-sequence I commonly use. This is extra awesome with Capslock mapped to Ctrl.

    Ctrl + s is typically bound in terminals to “stop output to screen”. I can live without it, as entering “Visual Mode” in tmux is a functional alternative.


    Fix clipboard integration on macOS + vi-style bindings

    Support for copying and pasting to the system clipboard doesn’t quite work on macOS. Thankfully, getting it to work takes very little effort.

    First you need to install the reattach-to-user-namespace program. You can grab it straight from Homebrew:

     
    $ brew install reattach-to-user-namespace

    Add this to ~/.tmux.conf and you are off to the races:

     
    # Check whether we are on macOS / OS X
    if-shell 'test "$(uname)" = "Darwin"' \
      'set-option -g default-command "reattach-to-user-namespace -l zsh"' ''
    
    # vi bindings in copy-mode
    setw -g mode-keys vi
    
    # Bind `v` to enter VISUAL-like selection mode.
    bind-key -t vi-copy v begin-selection
    bind-key -t vi-copy y copy-pipe "reattach-to-user-namespace pbcopy"


    Intuitive window splitting

     
    # Horizontal split (left & right):
    bind-key \ split-window -h -c '#{pane_current_path}'
    # Verical split (top & bottom):
    bind-key - split-window -v -c '#{pane_current_path}'

    Compared to the default <prefix> % and <prefix> ", these bindings makes which way splits occur really obvious. The -c #{pane_current_path} argument passed will start new splits in the same working directory you are on.

    As of version 2.3, split-window now understands the -f flag, which indicates full-width or full-height splits. These are perfect when you want a “scratch” shell to appear on the bottom or to the right of everything else:

     
    # For tmux 2.3 or newer
    # Full-height horizontal split with 33% width:
    bind-key | split-window -fh -c '#{pane_current_path}' -p 33
    # Full-width vertical split with 33% height:
    bind-key _ split-window -fv -c '#{pane_current_path}' -p 33


    Tiered navigation controls

     
    # Move between windows/tabs with `o` and `p`:
    bind-key -r p next-window
    bind-key -r o previous-window
    
    # Move between splits vi-style:
    bind-key -r h select-pane -L
    bind-key -r j select-pane -D
    bind-key -r k select-pane -U
    bind-key -r l select-pane -R

    Although the default <prefix> n and <prefix> p are easier to remember (“next” and “previous”), I find moving between windows faster with <prefix> o and <prefix> p as they are right next to each other. I happen to like vim-style cursor movements, so binding split navigations to <prefix> {h,j,k,l} is just logical.

    With this configuration, the navigation controls are tiered:

    1. Pane navigation: I can use home-row keys in vi-like bindings to move between panes in the current window.
    2. Window navigation: I can find o and p right above the home-row keys to move between windows or “tabs” in the current session.
    3. Session navigation: Above o and p I can use the parentheses keys to move between various sessions.

    The -r flag marks the bindings repeatable – this means they will not bring you out of prefix-mode after invocation, allowing you to repeat them or even invoke other bindings right after.


    Moving panes to another window

    It’s possible to move panes between different windows using join-pane. However it is slightly cumbersome to use (you have to pass in the window’s index as the -t argument). However using choose-window makes it as easy as selecting a window from a list:

     
    # Move pane to a different window. You can choose window from a list:
    bind-key m choose-window -F "#{window_index}: #{window_name}" "join-pane -h -t %%"
    bind-key M choose-window -F "#{window_index}: #{window_name}" "join-pane -v -t %%"
    
    # Swap windows. Choose window to swap with from a list:
    bind-key c-w choose-window -F "#{window_index}: #{window_name}" "swap-window -t %1"

    You can pick a window from a list and the current pane will be sent there as a horizontal split. <prefix> M will do the same, but will result in a vertical split.

    <prefix> C-w in will bring up a list of all windows. The current window will swap places with the one you select.


    Resizing panes

     
    # Resize panes directionally via vi-style bindings
    bind-key -r C-k resize-pane -u 5
    bind-key -r C-j resize-pane -d 5
    bind-key -r C-h resize-pane -l 5
    bind-key -r C-l resize-pane -r 5

    These binds <prefix> C-{h,j,k,l} to resize the current window by 5 columns or rows, depending on the direction. I find resizing 1 unit at a time takes a bit too long and I rarely need precise control. Resizing by 5 units is just right.


    Natural numbering

    Speaking of window indices, tmux starts numbering things at 0. Zero-based index is second nature to programmers and all, but the 0 key does not appear next to 1 on any keyboard. It’s awkward for this purpose. I think its more natural to have tmux starting counting from 1:

     
    # Begin numbering at 1:
    set -g base-index 1
    set -g pane-base-index 1
    
    # Maintain ordinality after swapping windows; and also make sure there is no gaps after killing windows:
    set -g renumber-windows on

    Closing panes & windows

    <prefix> x to close the pane, <prefix> X to close the window, and <prefix> Q to quit the session:

     
    bind-key x confirm-before -p "kill-pane #P? (y/n)" kill-pane
    bind-key X confirm-before -p "Kill window #W? (y/n)" kill-window
    bind-key Q confirm-before -p "Kill session #S? (y/n)" kill-session

    A prompt will be presented to confirm the action.

    Synchronize panes

    Another neat trick that tmux can do is synchronizing key-strokes across all panes in a window. I thought <prefix> & is an apt binding to toggle the behavior:

     
    bind-key & set-window-option synchronize-panes

    For more, you can find my full tmux configuration hosted on Github!.

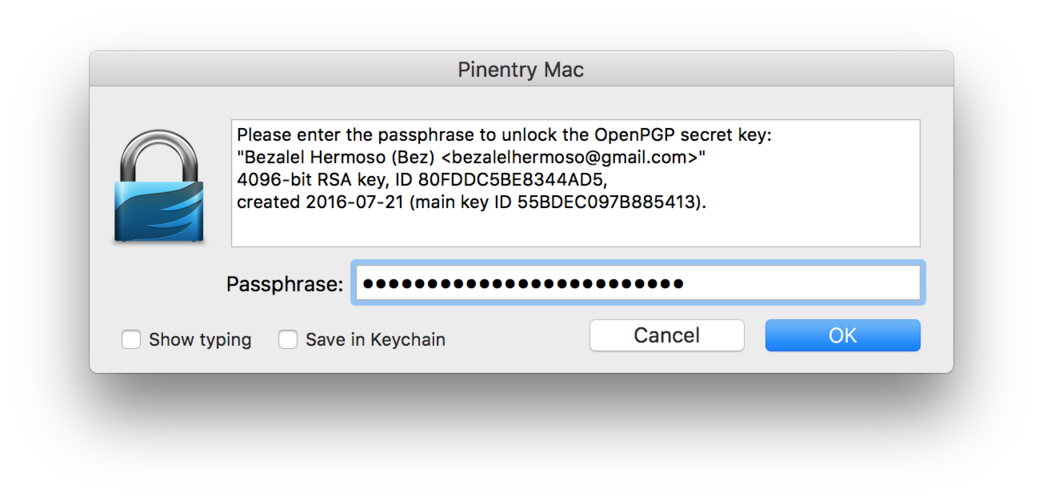
  • vim-gnupg + Neovim + MacOS and how to get pinentry to work

    vim-gnupg provides transparent PGP encryption/decryption when editing *.gpg et al files with vim. Sadly, if you are using a TTY-based pinentry your GNUPG setup like pinentry-curses, it won’t work (with no fault from the plugin author).

    The trick to get it to work is to somehow tell the gpg-agent to use an external pinentry program when triggered by vim-gnupg. For this, the pinentry-mac program fits the bill:

     
    $ brew install pinentry-mac

    Configure gpg-agent to use it as the pinentry program:

     
    # ~/.gnupg/gpg-agent.conf:
    pinentry-program /usr/local/bin/pinentry-mac

    Configure your shell to use the TTY-based pinentry in most circumstances:

     
    # ~/.bashrc ~/.zshrc, etc. :
    
    GPG_TTY=$(tty)
    # Tell the pinentry program to use the nice, full-screen pinentry program:
    export PINENTRY_USER_DATA="USE_CURSES=1"

    Restart your terminal application (or source your config file), then restart the gpg-agent:

     
    $ gpgconf --kill gpg-agent

    Now it’s just a matter of configuring vim-gnupg to override the PINENTRY_USER_DATA so that PGP prompts will use the GUI pinentry:

    let g:GPGExecutable = "PINENTRY_USER_DATA='' gpg --trust-model always"

    Now, whenever you edit/write PGP encrypted files in Neovim, the GUI pinentry will be used and vim-gnupg should start working as expected.

    GUI pinentry from pinentry-mac

  • Escaping backticks with the zsh line editor

    I just wrote my very first zsh plugin this week, and it has proven to be quite useful – I like to wrap identifiers/symbols in commit messages with backticks and often-times neglect to escape them. This would result in the identifier/symbol being evaluated, which is not what I want to happen.

    Here is my solution:

     
    # Expands `` to \`
    function expand-double-backtick-to-escaped-backtick {
      if [[ $LBUFFER = *[^\\]\` ]]; then
        zle backward-delete-char
        LBUFFER+='\`'
        # Bind backspace to something that undos the escape.
        bindkey '^?' undo-escaped-backtick-or-backward-delete-char
      else
        LBUFFER+='`'
      fi
    }
    
    function undo-escaped-backtick-or-backward-delete-char {
      if [[ $LBUFFER = *\` ]]; then
        # If chars to the left is an escaped backtick, unescape it.
        zle backward-delete-char
        zle backward-delete-char
        LBUFFER+='`'
      fi
      # Rebind backspace to default behavior
      bindkey '^?' backward-delete-char
    }
    
    zle -N expand-double-backtick-to-escaped-backtick
    zle -N undo-escaped-backtick-or-backward-delete-char
    
    bindkey "\`" expand-double-backtick-to-escaped-backtick
  • Subreddit quick-switcher in Google Chrome -- no extensions required

    Here is a convenient & versatile yet stependously easy trick you can do in Google Chrome, leveraging the built-in custom search engine functionality:

    • Go to Chrome Menu » Settings » Manage search engines… (under Search) and scroll all the way down to the Other search engines section.
    • Add a new entry:
      • Name: Anything you like (i.e. “Subreddit”)
      • Keyword: r
      • URL: https://reddit.com/r/%s


    Now, Whenever you want to visit a subreddit, simply jump to the Address Bar (Alt + D or F5 on Windows/Linux, Command + L on Mac), type in “r”, hit Tab, followed by the subreddit and then hit Enter; and you should be taken there.


    It’s not for Reddit only

    This is obviously not limited to the use for subreddits; you can create multiple other quick-switching “profiles” triggered by different keywords to bring you to other website URLs you visit/navigate to-and-fro frequently.

    For example, if your organization uses Jira, you can set-up the following:

    • Name: Jira
    • Keyword: j
    • URL: https://<ORG NAME>.atlassian.net/browse/%s

    This will allow you to quickly navigate to any project or issue via typing “j”, hitting Tab, followed by the project/issue number in the Address Bar.

    You are also not limited to create substitutions to the path segment of URLs; you can configure it to fill in any part of URLs; for example, https://%s.google.com will let you switch to the various Google services, etc.

  • Protip: copy files and/or directories from a Docker image

    I found myself needing to copy a bunch of files and directories straight from a Docker image. There is a trivial solution in the form of docker cp, but I came up with an alternative using docker run:

     
    $ docker run --rm <IMAGE NAME> \
       tar -cf - <SRC_PATH_1> [<SRC_PATH_2> ...] | tar -xvC - <DEST_PATH>

    This obviously relies on the the container having tar installed.

    This alternative has a few advantages over docker cp:

  • Protip: warn about file changes, deletions & additions before rsync

    I wrote a shell script that wraps rsync with a user prompt in cases where files are going to be added, deleted, or changed, which is a scenario when some work might get lost:

    safe-rsync.sh:

     
    #!/usr/bin/env bash
    
    args=$@
    
    diffs="$(rsync --dry-run --itemize-changes $args | grep '^[><ch.][dfLDS]\|^\*deleting')"
    
    if [ -z "$diffs" ]; then
      echo "Nothing to sync."
      exit 0
    fi
    
    echo "These are the differences detected during dry-run. You might lose work. Please review before proceeding:"
    echo "$diffs"
    echo ""
    read -p "Confirm? (y/N): " choice
    
    case "$choice" in
      y|Y ) rsync $args;;
      * ) echo "Cancelled.";;
    esac

    Usage

     
    > ./safe-rsync.sh --exclude='node_modules/' --recursive --progress --verbose ubuntu@aws-server102:/var/www/html ./html

    To skip the dry-run and just rsync regardless of any diffs:

     
    > yes | ./safe-rsync.sh --exclude='node_modules/' --recursive --progress --verbose ubuntu@aws-server102:/var/www/html ./html
  • Making perfect ramen with Lua: OS X automation with Hammerspoon

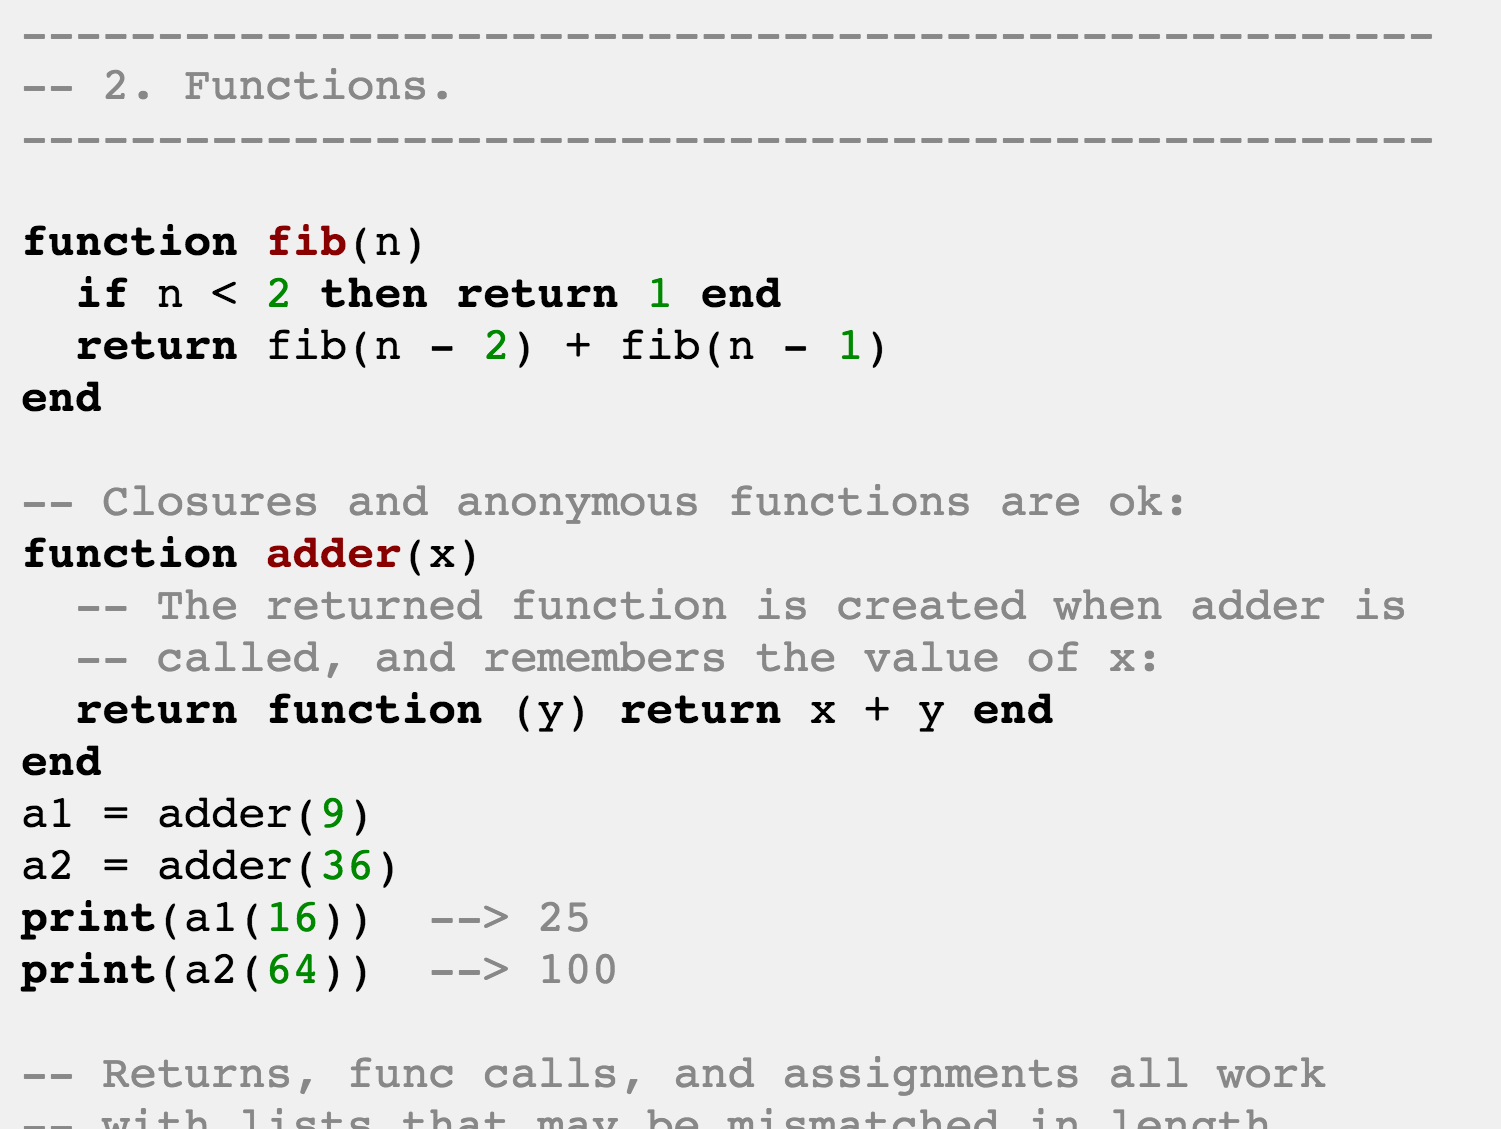
    Yesterday I discovered Hammerspoon, a project that touts itself as a “tool for powerful automation of OS X”. After giving it a try, not only did I find that statement to be true, but as someone who has ZERO prior practical experience with Lua, I was surprised by how relatively easy it was to get on board. Now, I’m hooked.

    Lua scripting

    Hammerspoon exposes system level APIs into a Lua environment, and config files are written in Lua.

    Syntactically, Lua reminds me a lot of Javascript and Ruby and, by extension, CoffeeScript. If you write in any of these three languages, you already have a leg up on the rest.

    I find Lua's simplicity refreshing. I found it easy to pick up the basics of Lua and start writing something in it, and was able to just learn more as I went. Functions are first-class citizens in Lua (can be passed around as arguments or as return values) so familiarity with functional programming paradigms goes a long way.


    However, unlike Javascript and Ruby, Lua does not have a built-in functional library to do things like map, filter, reduce, etc., but Hammerspoon comes with hs.fnutils which provides a bunch of functional utilities. Its not exhaustive, but its good enough for not-so-complex scripting which Hammerspoon falls into.

    Inside my ~/.hammerspoon/init.lua

    OS X already comes with Automator, which allows you to do automation on Macs. But there are things that you can’t do with Automator alone.

    1. Cycle through displays
    2. Open a web-page as soon as I connect to a particular WiFi network
    3. Make perfect ramen every time

    1. Cycle through displays

    I wanted to start small, so I picked a little annoyance I find myself battling with daily and aimed to solve it. One such annoyance pertains to switching focus between multiple displays:

    I have a dual-display setup at work and I have all my GUI applications running on the primary display, with the exception of a couple of full-screen terminal windows running tmux, vim, a zsh shell, monitoring tools, logs, etc. occupying the entirety of a secondary screen across multiple Spaces. I also have other full-screen applications living in their own Spaces on the primary display. My setup works really well for me most of the time, but there are certain combinations of circumstances on how applications are laid out across all Spaces and the order in which I have accessed them that results in a state where Command (⌘)-Tab or a three-finger swipe doesn’t bring me where I want to go. So my first challenge was to make something in Hammerspoon that would allow me to cycle through the displays with consistency.

    Here is my solution:

    -- DISPLAY FOCUS SWITCHING --
    
    --One hotkey should just suffice for dual-display setups as it will naturally
    --cycle through both.
    --A second hotkey to reverse the direction of the focus-shift would be handy
    --for setups with 3 or more displays.
    
    --Bring focus to next display/screen
    hs.hotkey.bind({"alt"}, "`", function ()
      focusScreen(hs.window.focusedWindow():screen():next())
    end)
    
    --Bring focus to previous display/screen
    hs.hotkey.bind({"alt", "shift"}, "`", function() 
      focusScreen(hs.window.focusedWindow():screen():previous())
    end)
    
    --Predicate that checks if a window belongs to a screen
    function isInScreen(screen, win)
      return win:screen() == screen
    end
    
    -- Brings focus to the scren by setting focus on the front-most application in it.
    -- Also move the mouse cursor to the center of the screen. This is because
    -- Mission Control gestures & keyboard shortcuts are anchored, oddly, on where the
    -- mouse is focused.
    function focusScreen(screen)
      --Get windows within screen, ordered from front to back.
      --If no windows exist, bring focus to desktop. Otherwise, set focus on
      --front-most application window.
      local windows = hs.fnutils.filter(
          hs.window.orderedWindows(),
          hs.fnutils.partial(isInScreen, screen))
      local windowToFocus = #windows > 0 and windows[1] or hs.window.desktop()
      windowToFocus:focus()
    
      -- Move mouse to center of screen
      local pt = geometry.rectMidPoint(screen:fullFrame())
      mouse.setAbsolutePosition(pt)
    end
    
    -- END DISPLAY FOCUS SWITCHING --

    With this in place, I can now confidently move across applications (and subsequently, across Spaces) with a few key-strokes. Thanks to Lua’s concise syntax and Hammerspoon’s well-documented API, this only took a few minutes to write. As you can see, binding hotkeys to custom actions are trivial with Hammerspoon.

    2. Open a web-page as soon as I connect to a particular WiFi network

    I admit I am a forgetful person, especially when it comes to relatively small routine stuff. At work we use Zenefits to keep track of our working hours, clocking in and clocking out from within their web portal. I don’t feel confident that I will always remember to clock first thing in the morning, so I naturally started looking for applications that I could configure to somehow remind me to clock in whenever I connect to our office’s network. I initially used ControlPlane for this and it worked well. But why not do it in Hammerspoon now that I got my feet wet?

    -- WORK-RELATED AUTOMATION --
    
    -- Open Zenefits Dashboard once connected to WiFi network at work.
    local workWifi = "ActiveLAMP Airport"
    local employeeDashboardUrl = "https://secure.zenefits.com/dashboard/#/"
    local defaultBrowser = "Google Chrome"
    
    hs.wifi.watcher.new(function ()
      local currentWifi = wifi.currentNetwork()
      -- short-circuit if disconnecting
      if not currentWifi then return end
    
      local note = hs.notify.new({
        title="Connected to WiFi", 
        informativeText="Now connected to " .. currentWifi
      }):send()
    
      --Dismiss notification in 3 seconds
      --Notification does not auto-withdraw if Hammerspoon is set to use "Alerts"
      --in System Preferences > Notifications
      hs.timer.doAfter(3, function ()
        note:withdraw()
        note = nil
      end)
    
      if currentWifi == workWifi then
        -- Allowance for internet connectivity delays.
        hs.timer.doAfter(3, function ()
          -- @todo: Explore possibilities of using `hs.webview`
          hs.execute("open " .. employeeDashboardUrl)
    
          --Make notification clickable. Browser window will be focused on click:
          hs.notify.new(function () 
            hs.application.launchOrFocus(defaultBrowser)
          end, {title="Make sure you clock in!"}):send()
        end)
      end
    end):start()
    
    -- END WORK-RELATED AUTOMATION --

    Next thing to automate is opening Tempo Timesheets in Jira every 2 hours as long as I’m in our ofice network to remind me to put in worklogs.

    3. Make perfect ramen every time

    A hot, 3-minute ramen is good. Sometimes its better al-dente. But warm, soggy, 10-minute ramen? Not cool.

    For better ramen:

    -- RAMEN TIMER --
    
    --Schedule a notification in 3 minutes.
    function startRamenTimer()
      hs.timer.doAfter(3 * 60, function ()
        hs.notify.new({
            title="Ramen time!",
            informativeText="Your ramen is ready!"
        }):send()
      end)
      hs.alert(" Ramen timer started! ")
    end
    
    --Bind timer to `hammerspoon://ramentime`:
    hs.urlevent.bind("ramentime", startRamenTimer)
    
    -- END RAMEN TIMER --

    Hammerspoon’s hs.urlevent is a beautiful thing: it allows you to bind some action to a URL with a hammerspoon:// scheme. This makes Hammerspoon actions almost universally accessible! In this case, opening hammerspoon://ramentime will start the timer. Now, we can if we want create a bookmarklet on the browser’s toolbar pointing to it that when clicked will activate the timer.

    Because of the portability of URL schemes, I was able to create a very basic Alfred Workflow that triggers the timer. have to do is type ramen into Alfred to ensure prime ramen all the time:

    View post on imgur.com

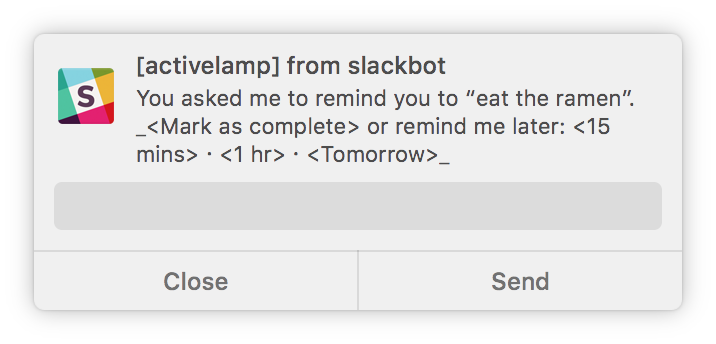
    ...and three minutes minutes later...

    “Hey, Jarvis…”

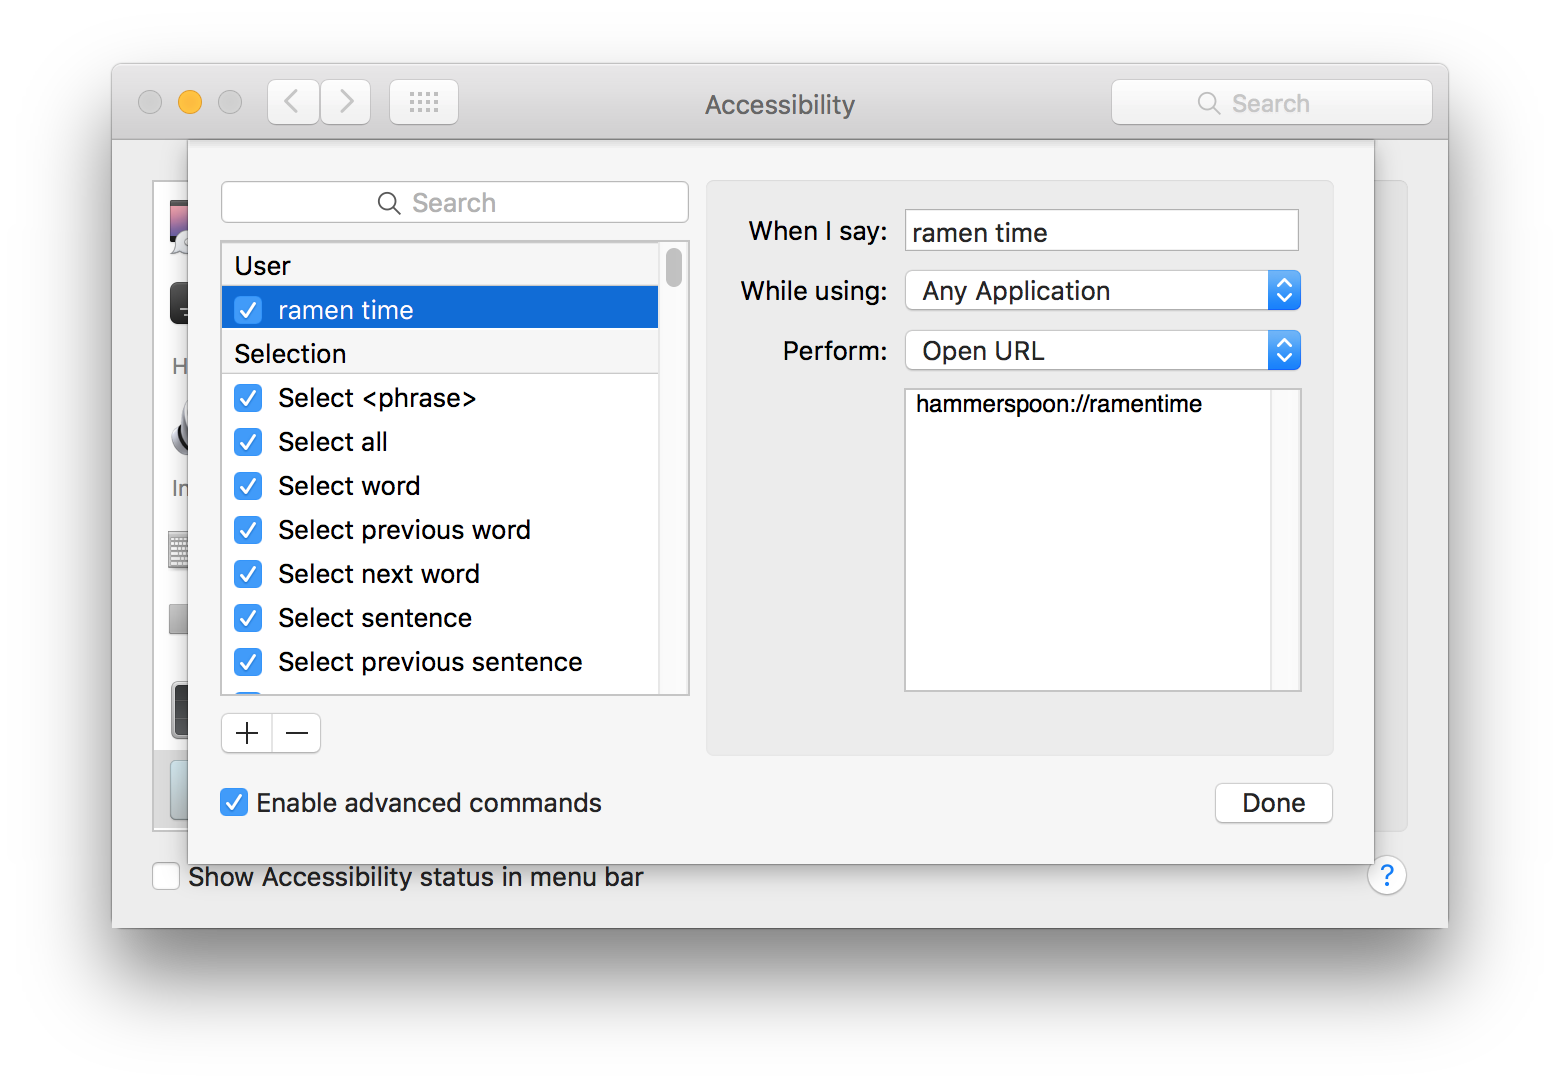
    Another nifty thing you can do is create a dictation command to trigger the timer. Enable Dictation on your Mac, go to System Preferences > Accessibility Dictation..., click the Dictation Commands... button, and turn on Enable advanced commands. From here you can add a new voice command in the list and configure it to open the time via URL. Have fun!


    If you are into automating things on your Mac, give Hammerspoon a spin. You might like it, too.

  • Breeze through OS X alert notifications with swift efficiency through keyboard shortcuts

    I think one glaring omission from OS X’s huge set of handy keyboard shortcuts for common functionality is the ability to dismiss all alert notifications using a global hotkey. Right now, the only way to clear out a backlog is to click on the “Close” button on each and every single notification item. Going through a backlog of alert notifications is a constant dilemma I face on a normal work day, and I was suprised when I learned there is no other way of dimissing alert notifications that is more efficient.

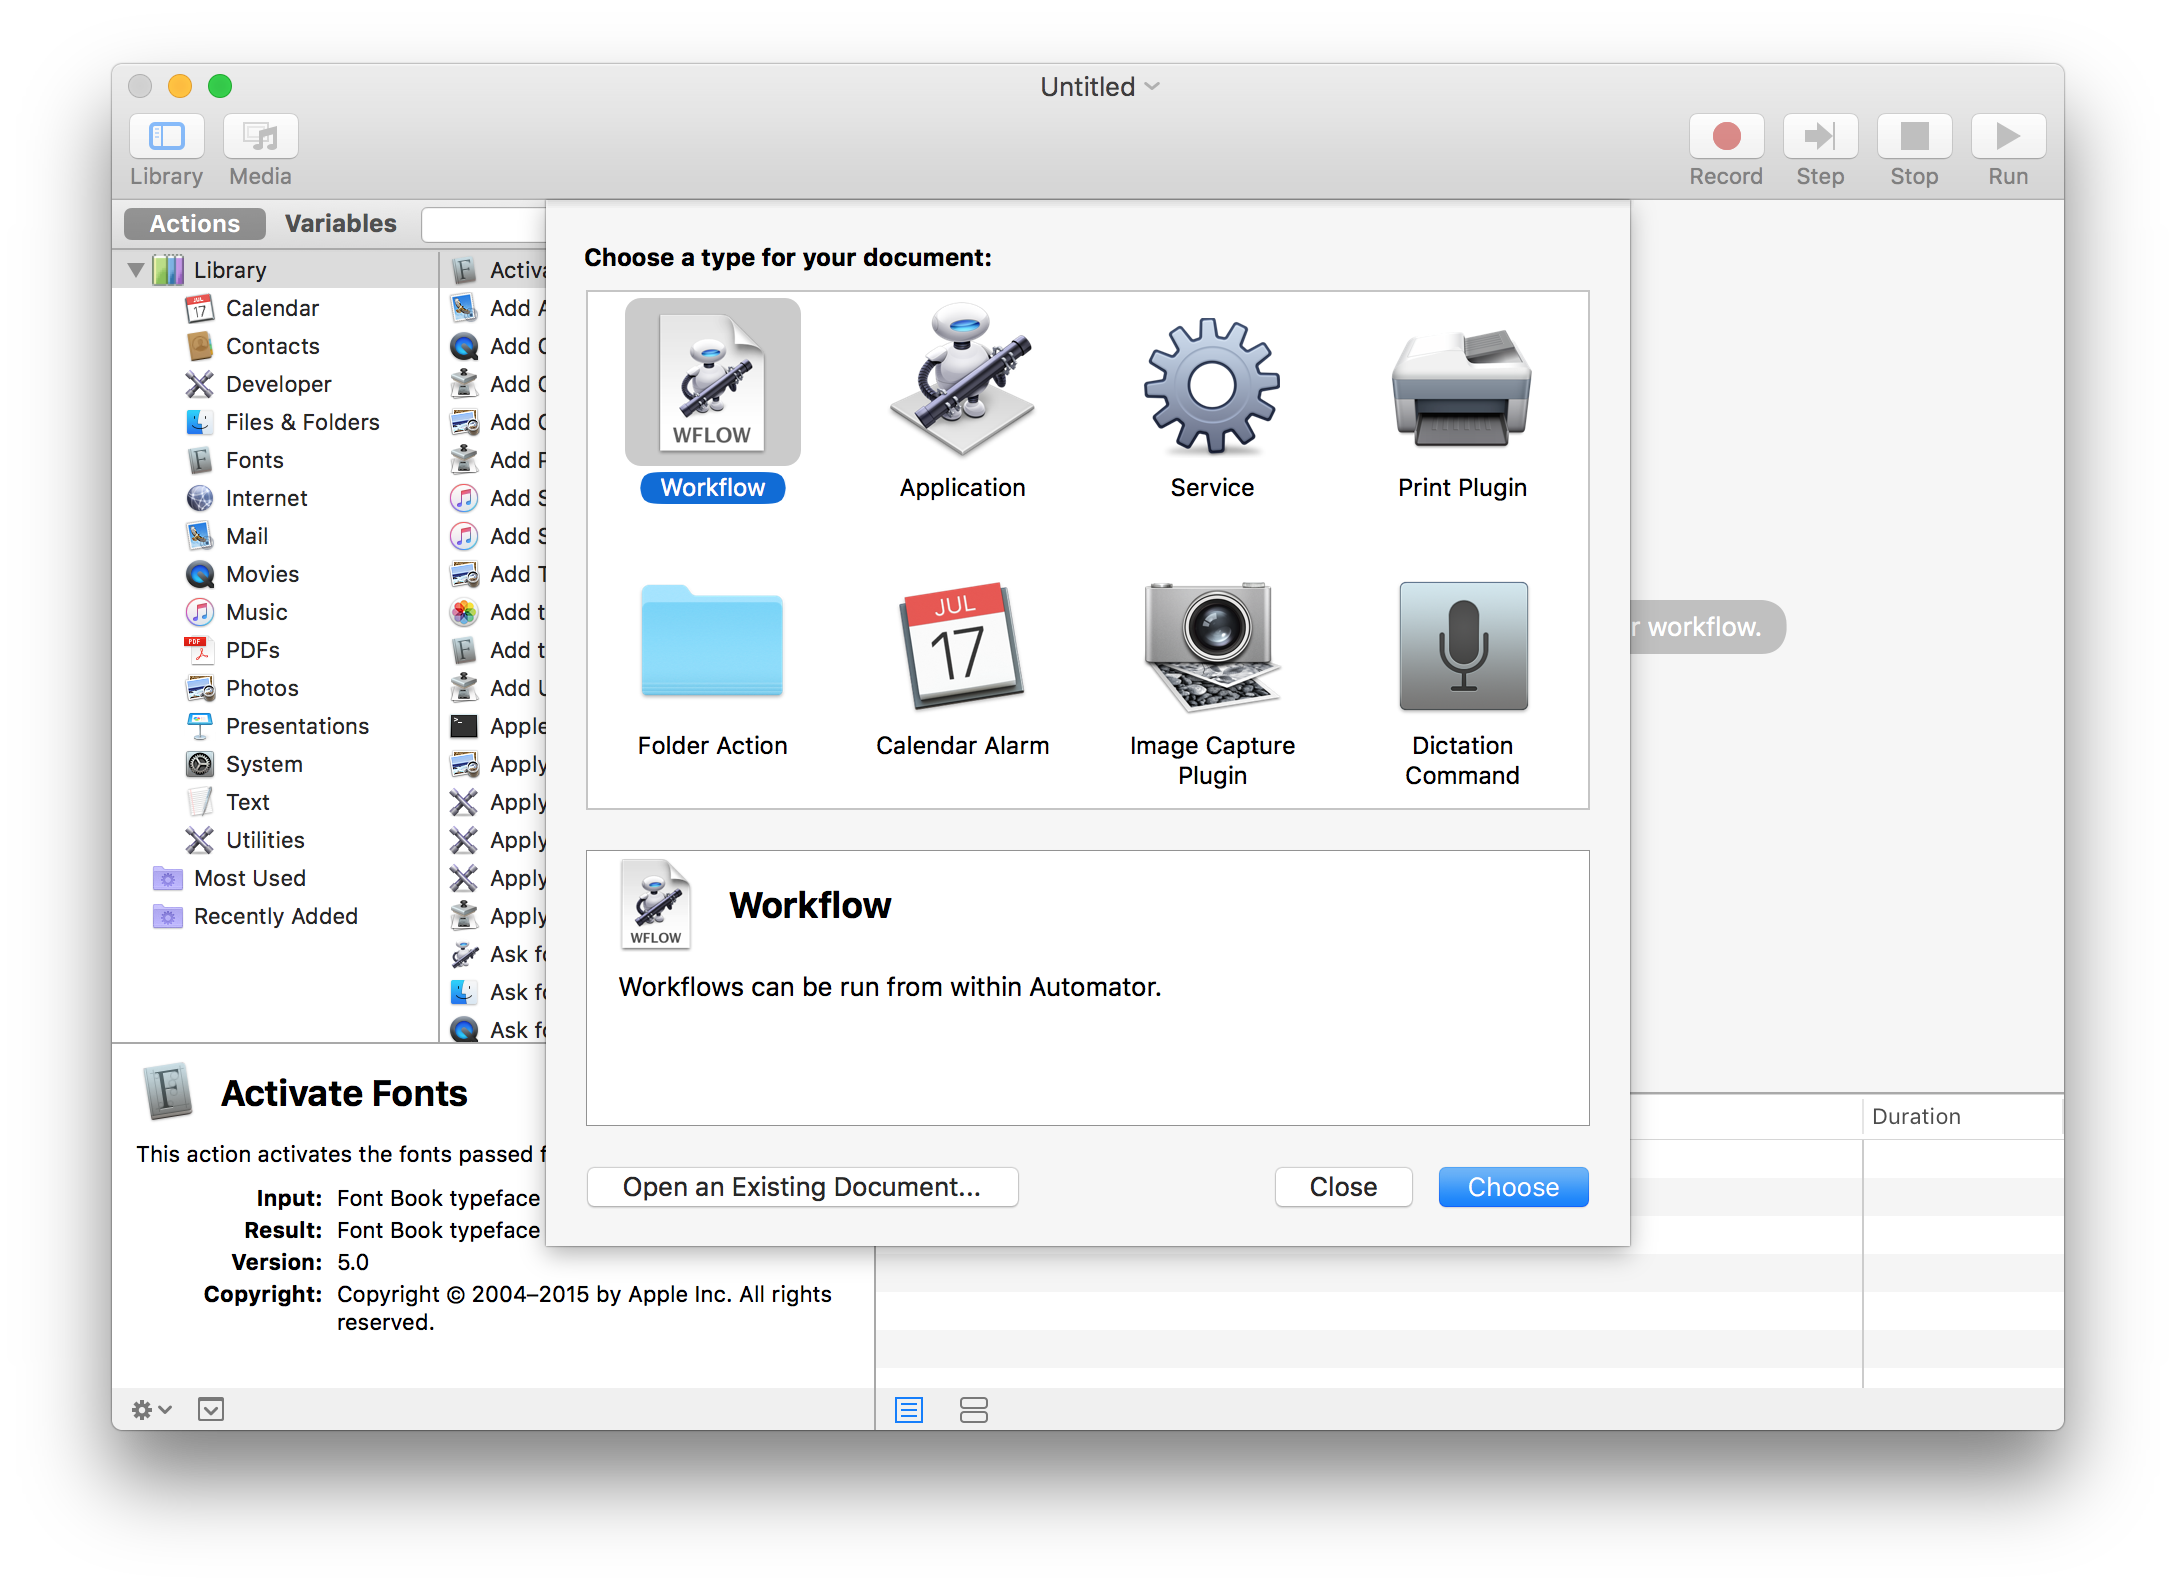
    I actually found a solution by markhunte from Ask Different which worked quite well in the beginning. The solution in a nutshell is creating a custom service using Automator which executes a workflow that runs an AppleScript snippet that automates the dismissal of notifications, and assigning a global hotkey to execute it.

    The solution works well but only when OS X cooperates – running the workflow within Automator cause zero problems, but making it work through a keyboard shortcut is hit-and-miss. I found myself mucking around with accessibility settings in System Preferences > Security & Privacy > Privacy a lot, adding system applications tucked away in /Library/CoreServices/ to the Accessibility list before getting it to work for the first time, until I discovered that the service simply fails with no explanation when invoked while I have certain applications in focus.

    Eventually I figured out a more reliable way to accomplish this using a third-party application called BetterTouchTool.

    I'll also share additional workflows I wrote that allows you to perform more fine-grained actions like acting on one notification item at a time, i.e. dismissing it, clicking it, or clicking on the secondary action if available. This is great for those alert notifications that supports quick reply:

    Step 1: Create workflows in Automator

    You will need to create a workflow in Automator for each of the AppleScript programs listed below.

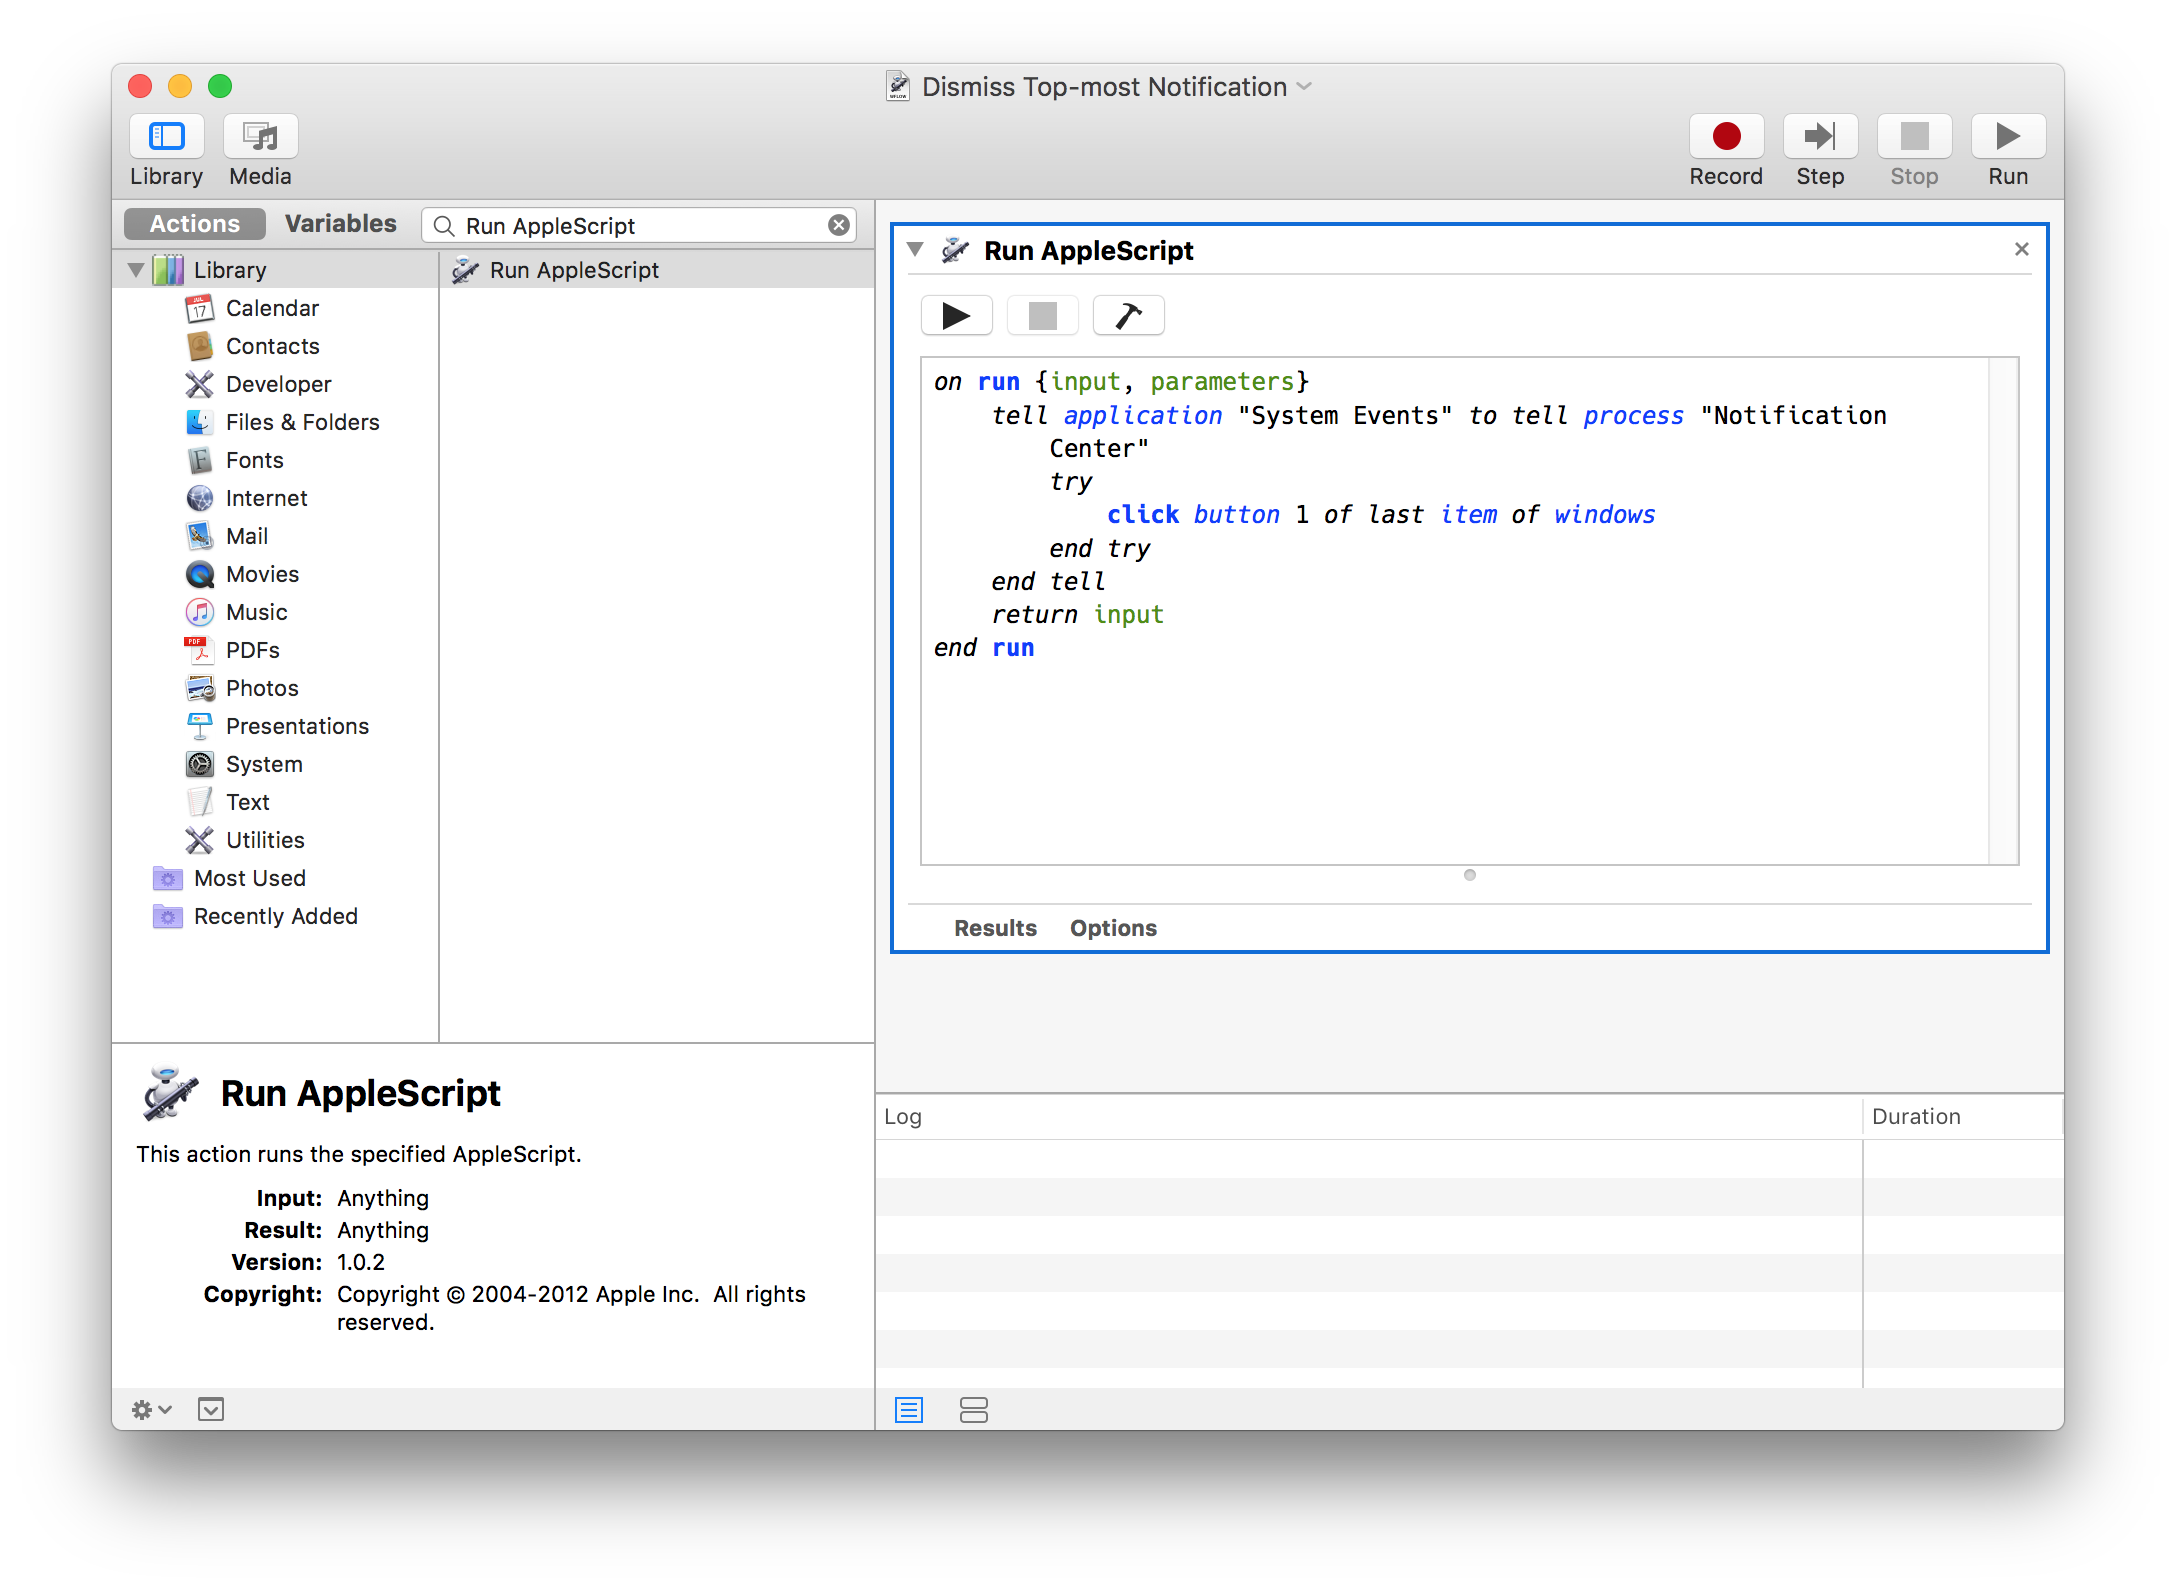
    On each workflow, select “Run AppleScript” from the Actions menu, put in the corresponding AppleScript code in the text box that appears on the right-side, and save the workflow somewhere you can find it later on.

    1.1 Dismiss All Notifications.workflow

    Actions > Run AppleScript…

    on run {input, parameters}
        tell application "System Events" to tell process "Notification Center"
            click button 1 in every window
        end tell
        return input
    end run

    I must give credit to markhunte from the Ask Different as this accomplish almost exactly what his script does, albeit rewritten more concisely.

    1.2 Dismiss Top-most Notification.workflow

    Actions > Run AppleScript…

    on run {input, parameters}
        tell application "System Events" to tell process "Notification Center"
            try
                click button 1 of last item of windows
            end try
        end tell
        return input
    end run

    1.3 Click Top-most Notification.workflow

    Actions > Run AppleScript…

    on run {input, parameters}
        tell application "System Events" to tell process "Notification Center"
            try
                click last item of windows
            end try
        end tell
        return input
    end run

    1.4 Click Secondary Action on Top-most Notification.workflow

    Actions > Run AppleScript…

    on run {input, parameters}
        tell application "System Events" to tell process "Notification Center"
            try
                click button 2 of last item of windows
            end try
        end tell
        return input
    end run

    Teaching AppleScript is obviously beyond the scope of this post. If you are not familiar with it, there are tons of articles online that can get you started, like this one.

    Important: Do not save these in iCloud as you will need another non-MAS application to access them on a later step.

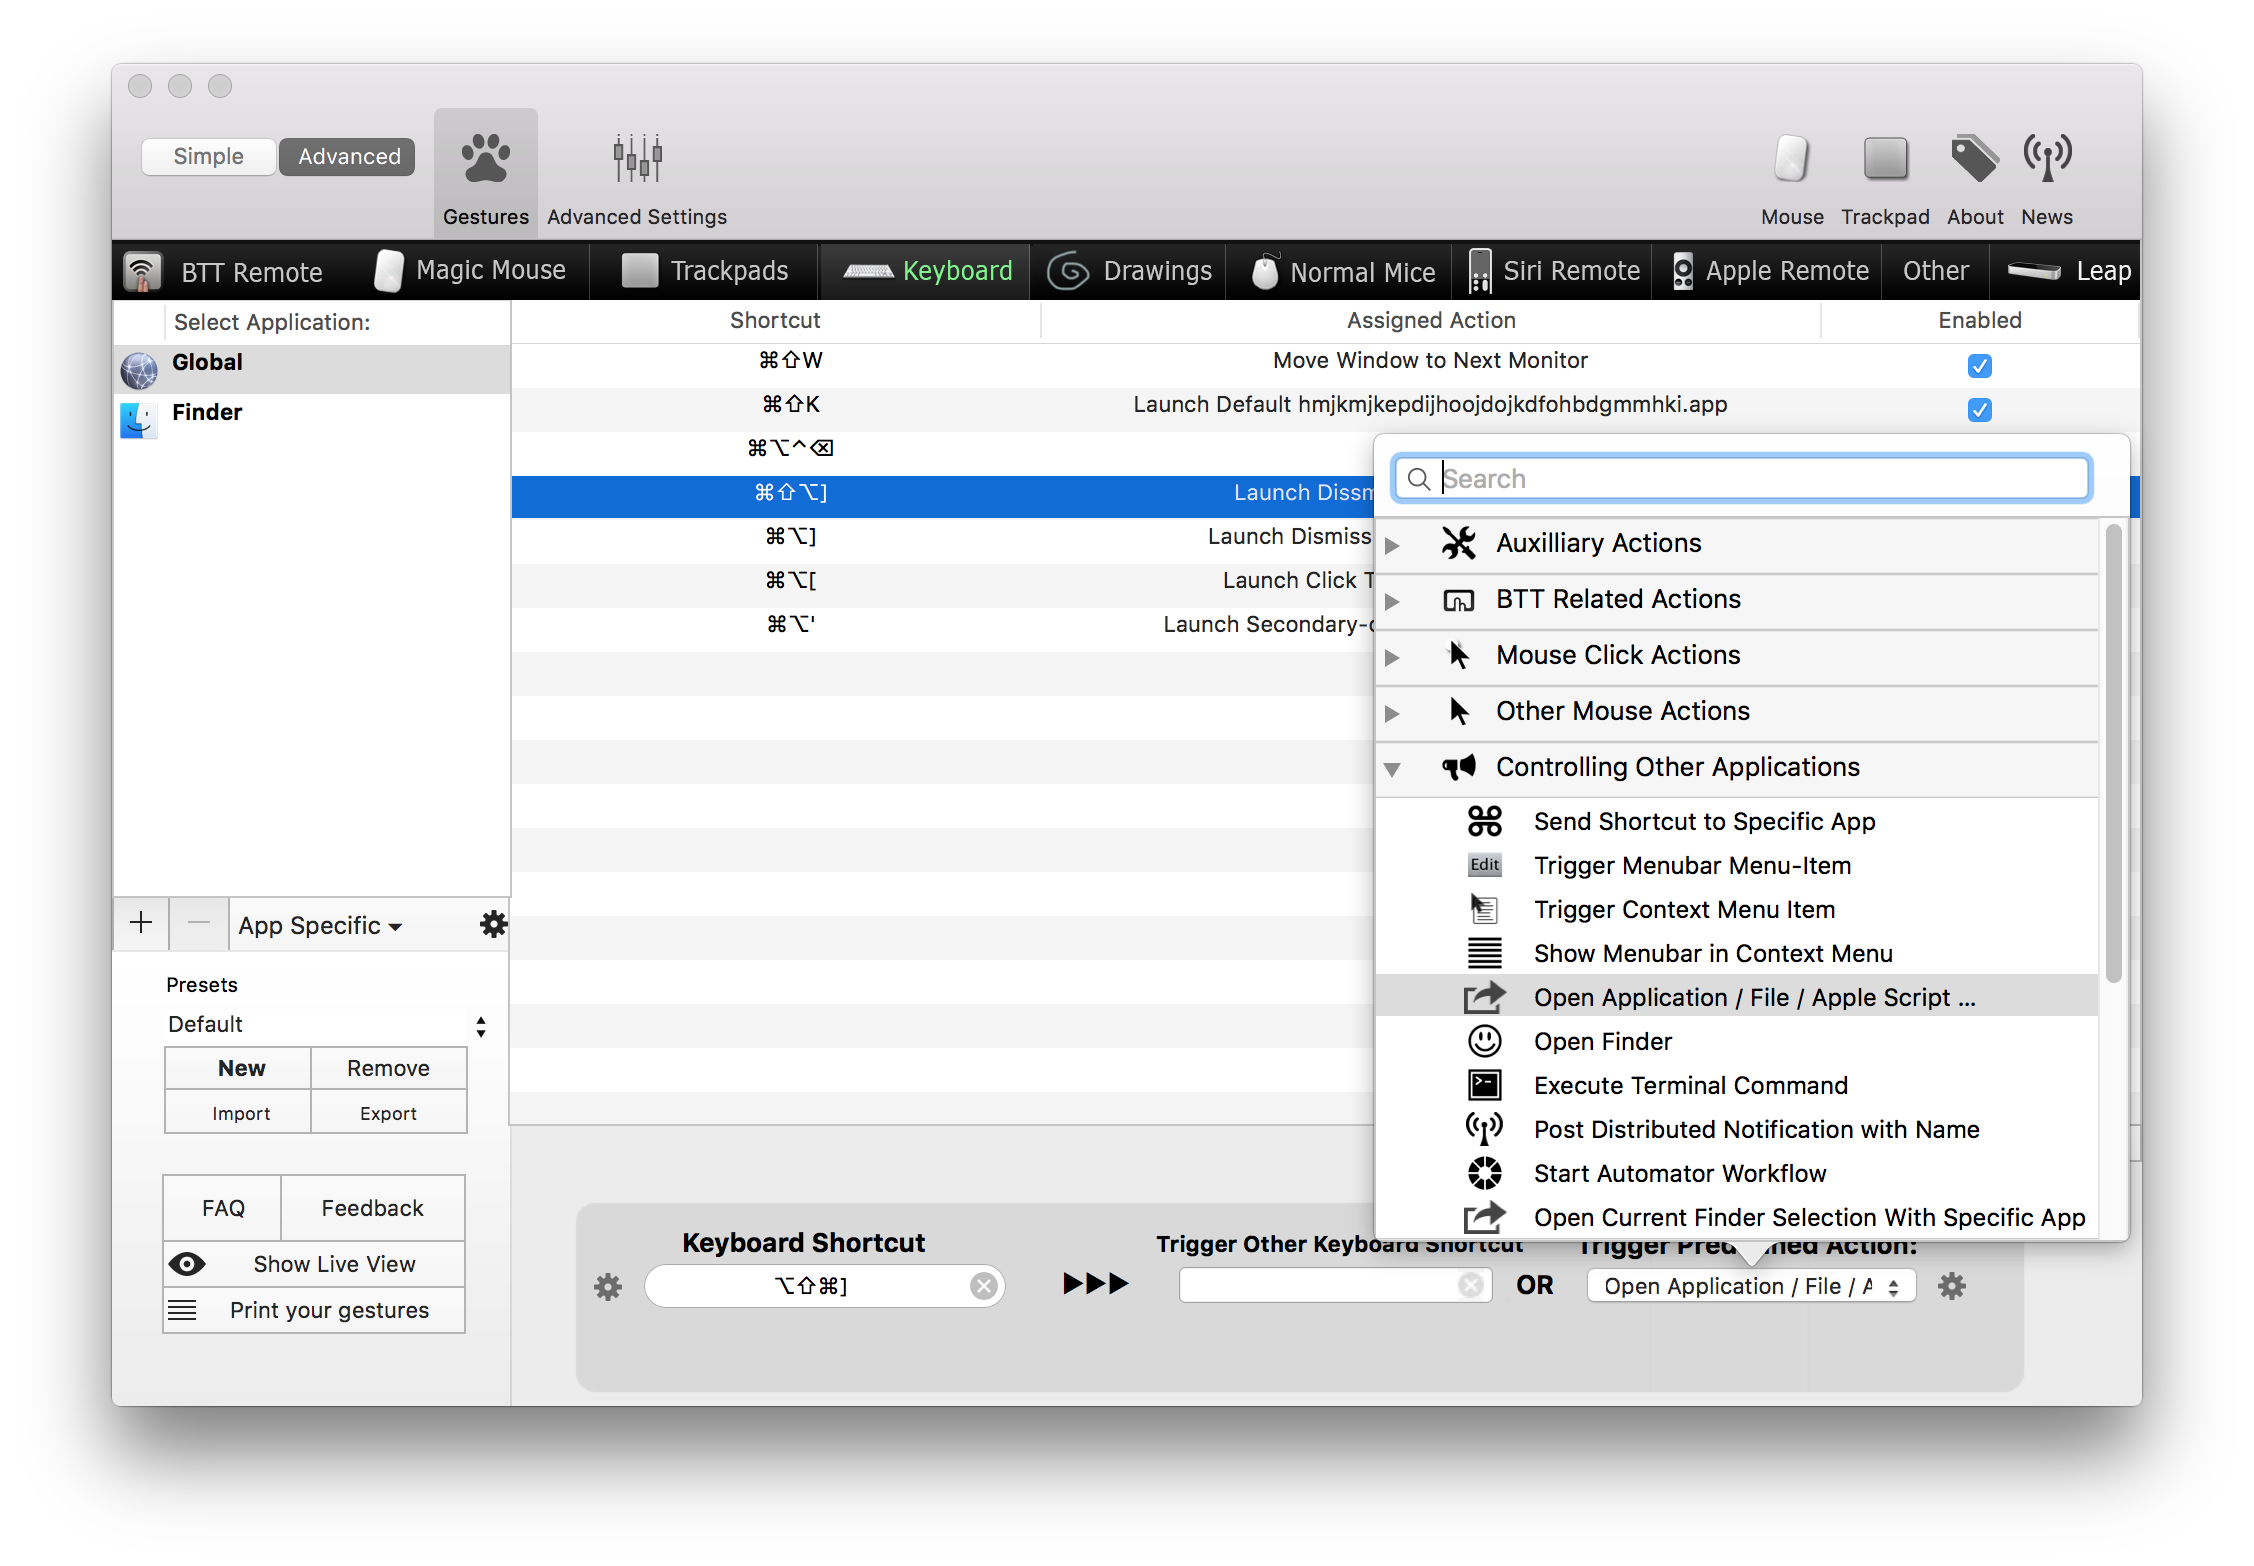
    Step 2: Assign global hotkeys to the Automator workflows

    There is a number of productivity applications out there that allows you to invoke an Automator workflow through a global hot-key, like Alfred and Keyboard Maestro.

    However, I personally use BetterTouchTool as I already have it installed to accomplish similar tasks.

    My mapping is as follows:

    • ⇧ ⌥ ⌘ ] - Dismiss all notifications
    • ⌥ ⌘ ] - Dismiss top-most notification
    • ⌥ ⌘ [ - Click top-most notification
    • ⌥ ⌘ ' - Click secondary action on top-most notification

    BetterTouchTool is a really handy application all in all that will allow you to map an unthinkable amount of things to keyboard shortcuts, mouse & trackpad gestures, and a bunch of other peripherals. It has been a free application for a very long time, but it won't be long until the "pay as much as you want" licensing model will take into effect. But I highly recommend it.

    Important: If you just installed BetterTouchTool, you will have to grant it access to accessibility services on your system. Go to System Preferences > Security & Privacy > Privacy, and add BetterTouchTool to the list under Accessibility.

    Step 3

    Try it out! Go ahead and prune thorugh your alert notifications with more effiency. Or, actually learn to turn on “Do Not Disturb” once in a while (no judgement here – I am also guilty of this.)

    Extra keyboard-fu protip: You can quickly toggle “Do Not Disturb” by Option-clicking on the Notification Center icon on the menu bar, or you can actually assign a global hotkey to toggle it in System Preferences > Keyboard > Shortcuts Mission Control > Turn Do Not Disturb On/Off (It’s so simple I don’t even know why I don’t bother to do this.)

  • Simple solution for tmux causing system freezes on Mac OS X

    2015-10-21 Update: Version 2.1 of tmux has just been release a couple of days ago and from what I can tell it has addressed this fatal issue! So the simpler solution would be doing brew upgrade tmux to get the recent release. If you are stuck using 2.0 however, I hope this post is helpful.

    What fixed it for me was adding a single line to my ~/.zshrc and a single line to my ~/.tmux.conf file:

     
    # ~/.zshrc
    tmux start-server
     
    # ~/.tmux.conf
    new-session

    It turns out, after trial and error, that the OS freezes (or in worst cases, kernel panics on older OS X versions) usually happen when you close the very last of all tmux pane of the very last tmux session.

    With these additions to my config files, a tmux server is started with an empty tmux session whenever I fire up a terminal window for the first time. This means that I always have an empty tmux session – still active although never used – even after I exit out all the sessions I create on a daily basis.

    I never had my MacBook Pro grind to a stop as soon as I close out all tmux sessions and having to forcibly turn it off.

    This does not fix tmux, but is a simple work-around for a problem that has a potential to incur data loss in the future.

  • Fix errors when building PHP 5.6.14 with phpbrew on Mac OS X

    Last night I decided to make the switch from using purely Homebrew to manage my local machine’s PHP version to using phpbrew. However the switch was without any issues.

    I needed to install PHP version 5.6.14 with mcrypt:

     
    > phpbrew install 5.6.14 +default+mcrypt

    However the build process keeps failing. Inspecting the build log gives me the following errors at different stages of troubleshooting:

    configure: error: Cannot find OpenSSL's <evp.h>
    configure: error: Please reinstall the BZip2 distribution
    ld: symbol(s) not found for architecture x86_64 clang: error: linker command failed with exit code 1 (use -v to see invocation) make: *** [sapi/cli/php] Error 1

    Solution

    What I ended up having to do was re-install XCode Command-Line Tools and install a few libraries via Homebrew (because apparently, OS X does not ship them, or ship older versions):

     
    > xcode-select --install
    > brew install openssl libxml2 mcrypt
    > brew link openssl libxml2 --force

    And that’s it! The build completed, and now I have PHP 5.6.14 available whenever I want it.

    If you are encountering these errors, I hope this helps you. Or if you haven’t attempted it yet but are planning to build PHP with phpbrew, I hope this will save you the trouble.

    Happy coding!

  • Vim indicator in Powerline theme

    I find it hard to remember if I stepped in to the shell from vim or not. I find myself attempting to open a file only to be told by vim that I already have the file open – indeed, I already was editing the file. I just forgot that I stepped into shell via :sh a few minutes before. Worst yet are the times when I typed exit on my shell thinking that I was coming vim, only to find I was wrong because terminal window closes.

    I can’t be the only one.

  • Fun with functions in Javascript: high-order functions

    Functional programming has been gaining popularity lately. It’s an interesting paradigm for solving problems and departs quite a bit from familiar concepts programmers like me who use object-oriented languages are used to. Just like object-oriented programming, it has its own sets of design principles and philosophies. I don’t pretend to know a lot of them – in fact I only have barely scratched the surface, but two concepts has stood out to me so far – its the concept of high-order functions and the slew of interesting things you can do with them.

    High-order functions

    high-order functions are simply functions that operate on other functions, by taking them as arguments are having functions as a return value (so meta). This is one of things you find in a languages like Haskell and Erlang (so I’ve heard) or even Javascript barring some short-comings where functions are first-class citizens, which is a cool way of saying that they can be treated like any other value i.e., you can assign them to a variable, append them to an array, pass them around as function arguments or return them as return values, etc. i.e. In Javascript, function foo () {} is equivalent to var foo = function() {}.

  • A practical usage of JavaScript's Function.toString method: CouchDB maps & reduces

    After reading a brief on CouchDB, I decided to use it instead of MongoDB for a pet project and began diving right in. Cradle, a CouchDB client for Node.js, was one npm install away. Installing CouchDB and creating the database was a breeze. I was able to quickly store data and refined the structure when needed. Gotta love NoSQL!

    Querying data is where it got a bit more interesting: fetching data requires the creation of views. This is unlike other popular data stores that has their own query DSLs (domain-specific language), like SQL for SQL-flavored RDBMS, JSON-based query DSLs for MongoDB and other NoSQL stores.

    CouchDB views are simply applications of the MapReduce paradigm. In a nutshell, you provide map functions and/or reduce functions which will be used to narrow down the data-set and/or to reduce a data-set into a single aggregate value. Sounds easy. So I went ahead and pecked these on my keyboard:

  • Keep calm and say `pls`

    Months ago I found this hilarious and useful bash alias on Twitter which is a real gem. Typing the F word when I realize I forget to start with sudo when I should have is somehow satisfying.

    Lately I expanded it a bit more, while also replacing the profanity with a little bit of courtesy. In .bashrc:

     
    pls() {
    
       echo ''
       echo 'No problem!'
       echo ''
    
       if [ $# -eq 0 ]
       then
            sudo $(history -p !!)
       else
            sudo $@
       fi
    }
  • Download server-side assets and other non-package dependencies with Composer

    Sometimes your project has some server-side dependencies that aren’t PHP libraries but which your PHP application can’t run without. Or they could be assets that you don’t want in your code repository, like huge database fixtures that you only need during dev and integration testing. Instead of adding them to your Git repository or any VCS of choice, why not use Composer to resolve them?

    If you are not aware what Composer is, then I think you are missing out. Essentially it is a dependency manager for PHP. It’s kinda like PEAR, but its so much better. It allows you to define your external library dependencies in a composer.json file, typically on your project root, and have it resolve and download them for you, including your dependencies’ own dependencies. Its an awesome, widely-adopted tool which greatly improves the PHP developers’ quality-of-life. I urge you to read the docs and start using it.

  • Handling parameters for Heroku deploy in Symfony2

    Configuring environment-specific parameters in Symfony2 has been made easy thanks to Incenteev\ParameterHandler\ScriptHandler::buildParameters. Attaching itself to the Composer workflow, it provides a very intuitive interface for defining required parameters defined in app/config/parameters.yml.dist.

    In case you don’t know, this mechanism also gives you the ability to specify required parameters specific to your app which developers/deployers need to fill out:

    # app/config/parameters.yml.dist
    parameters:
        database_driver:   pdo_mysql
        database_host:     127.0.0.1
        ...
    
        # Project-specific parameters not part of the standard distribution:
        elasticsearch_hosts: [ http://localhost:9200 ]
        elasticsearch_index: main
  • Documenting polymorphic collections in RESTful API endpoints with NelmioApiDocBundle

    Lately I’ve been using NelmioApiDocBundle to document REST APIs I implement in Symfony. This bundle generates a beautiful documentation for your API endpoints, and it base them on the forms you use to gather input and also integrates with JmsSerializerBundle and document the output of the endpoints based on how you configure your entities to be serialized.

    Usually NelmioApiDocBundle would just work out-of-the-box provided you added the right annotations properly on your controllers. However I discovered that documenting polymorphic collections is a little tricky and requires some extra work.

    To illustrate the use-case:

    I have an /activities/recent.json endpoint that returns a list of recent activities which could be of different types:

  • Consolidating alike services via service tags and the Composite design pattern: "Reading bundle resources..." part 3

    This post dives into the concept of tagged services and how it can be utilized to compose services with pluggable components to add extra behavior to a service without modifying its underlying code, as stipulated by the SOLID principles.

    This is a continuation of a series of blog posts I wrote about reading resource bundles & caching in the context of a fictional TheHunt\SitemapBundle bundle. Here are part 1 & part 2 if you haven’t read them yet.


    In the previous post, we added a new service named thehunt_sitemap.annotation_link_collector, which gathers metadata from annotations on controllers. This is somewhat similar to thehunt_sitemap.link_collector, although this one reads YAML files instead of annotations, and has a thin caching layer. However both of them have similarities, which is being able to produce a list of links. Afterall, this is their ultimate responsibility; from where they gather links from are just implementation details.

  • Unit-testing Symfony forms: observing DRY by asserting within data providers

    I’ve been using a lot of the Symfony Form component lately to handle input in REST endpoints. Instead of handling the parameters myself within controllers, I use forms to do it for me for various reasons:

    • It keeps the controllers thin.
    • It makes the definition of the parameters explicit. The form itself serves as the documentation of what the REST endpoint will accept as valid input.
    • It makes validation a breeze thanks to how the Form component integates with Symfony Validation.
    • It makes our Swagger API documentation up-to-date with our code at all times, thanks to NelmioApiDocBundle
    • It helps making changes to the endpoint’s interface a lot easier.
    • …and quite importantly, it makes the parameter handling and validation testable.
  • Reading Annotations: "Reading bundle resources..." continued

    There seems to be quite a sizable portion of the PHP community that think that PHP annotations are a bad idea. However, there is also a sizable portion that think that PHP annotations is not evil, and maybe actually a godsend, if the wide-spread usage is of any indication.

    Personally I acknowledge that using them can be pain to deal with in when used in the wrong places, but I also think that it has a place in a limited set of areas. It provides a lot of convenience with almost to zero drawbacks if used within the bounds of the domain exclusive to your app, but it can cause a lot of coupling when used to define metadata on third-party libraries/bundles that you hope to plug into your app, making it brittle. I think this is rooted in the fact that there is currently no easy way to override configuration specified via annotations, or actually to support such mechanism.

    There is also the problem that the configuration will reside where the subjected class is on. This poses a huge problem when you try to add configuration on a third-party class. Going in and modifying a class shipped by a third-party library is obviously a very horrible idea. I was faced with this problem when trying to document a REST API I was writing using Swagger-PHP: since I was using FOSUserBundle and extending its User class for use in my app, I was faced with two possible approaches:

  • ConfigCache: Reading bundle resources and caching for performance

    Some back-story: In the course of contributing some Swagger-specific features to the awesome NelmioApiDocBundle, the Symfony\Component\Config\ConfigCache class was brought to my attention. To give you an idea how this fits in, you should know that the bundle generates an HTML page documenting your REST API. It gets the needed information from metadata declared as @ApiDoc annotations in controllers in the Symfony app. On top of that, the bundle also processes metadata from different libraries: integration with JmsSerializerBundle, Symfony’s Validator and Routing component, FOSRestBundle is built-in.

    All these libraries does a good amount of caching on their end. However, NelmioApiDocBundle does not. This means, every time the documentation page is being viewed, all documentation metadata is being re-built. Although it did not present any significant performance issues in the beginning, it is apparent that things can speed up a bit if we could skip all these steps if none of the configuration regarding routes, serialization, or validation hasn’t changed at all. I mean, how often do they change in production, anyway?

  • Zend Framework 2 Cookbook - A Review

    If there is one adjective to describe this book, it would be that it is very informative. This is a perfect companion for when you are a ZF2 developer that is starting to develop your first app. I wish this was available to me when I just started on mine. This would save you a lot of time trying to figure out how things work and how to implement solutions to common problems (routing, navigation, authentication, etc) and let you focus on business requirements that are specific to your project.

    This book covers a lot of ground, which is what you could hope for from a cookbook. The ZF2 team and contributors has done a great job with the official documentation, and this book is a great supplement to it. What makes this a good addition to the official docs is the fact that each recipe uses more than one Zend components to build out a solution. The official docs helped me see how each component can be used by themselves, but this cookbook gives concrete examples on how they can be used in conjunction with others as a part of a bigger picture. This cookbook reveals one of ZF2’s biggest strength which is its modularity and shows you ways how to wield it.

  • Locating bundle resources

    A month ago when I was writing a bundle that I needed for a Symfony project, I was presented with a challenge that I couldn’t quite figure how to solve: I needed to locate files from with other bundles’ Resources/ directory during my bundle’s “bootstrap” phase. Basically, I was trying to configure a service definition to pass in an array of file paths to YAML files that are scattered across different bundles as an argument.

    Normally, you could just do something like this to get the absolute file path to a file from within any bundle:

    <?php
    
    $location = $this->container->get('kernel')->locateResource('@FooBundle/Resources/config/foo_metadata.yml');
    
    /** do stuff **/

    However, since I needed to perform this during the early stages of the application life-cycle – even before the compiler is even compiled – the kernel service isn’t available yet.

  • Symfony2 development, Infrastructure as Code, and consistent environments with Vagrant

    My new job at ActiveLAMP has put me in a position where I get to use and learn a wider set of technologies. And its a great position to be in. Instead of confining myself with the boundaries of the LAMP stack, now I am working on projects with requirements that necessitate the use of other technologies to achieve specific aspects of the product that are particularly demanding on their own right that the the unholy quadro that is Linux-Apache2-MySQL-PHP just isn’t sufficient anymore.

    For one project I have to learn and work with Apache Solr to provide performant and speedy search capabilities, which include fuzzy full-text searches and geo-spatial queries as well. On another I am working with Elasticsearch to provide the exact same set of searching capability. In other instances, I have to deal with legacy code which requires legacy versions of PHP and the rest of the technology stack used.